
Of course we cannot always share details about our work with customers, but nevertheless it is nice to show our technical achievements and share some of our implemented solutions.
I'm currently building a new Docker environment. For the last almost 2 years I've successfully been running Docker containers in Rancher 1.x, see some related posts:
Now that Rancher 2.0 recently came out, it's definitely worth to see what can be achieved with it. Something which hit my eye when cross-clicking through the new user interface was the "persistent storage" section. As it turns out, the new Docker environment I'm building needs to have some Docker containers which require an external file system (NFS share) being mounted from a central NFS server. As you can read in my post "The Docker Dilemma: Benefits and risks going into production with Docker" I'm not a fan of mounting local volumes from the Docker host into the container (mainly for security reasons) but mounting a network file system, like a NFS share, is less of a security risk. But let's call it straight by the name: A Docker container or better said the application running inside the container should be built cloud-ready in mind. This means that there shouldn't be any fixed mounts of (internal) file servers (-> Object Storage through HTTP call is the future). But anyway, in the short term this environment still requires that particular NFS share mounted into some of the containers.
Back to the topic: Rancher 2.0 comes with a cluster-wide storage solution. A lot of storage drivers (volume plugins) are ready to be used, including the "NFS Share". And here's how you do it.
Inside the Kubernetes cluster level (here mh-gamma-stage), you can find a top menu entry "Storage" and "Persistent Volumes" inside of Storage.
Click on "Add Volume" and the following form will be shown:
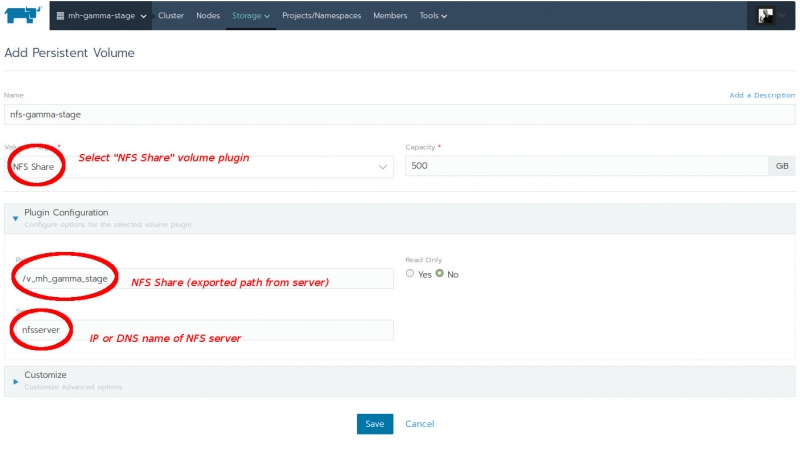
Give the new volume a meaningful name; here I chose nfs-gamma-stage.
Select the correct volume plugin; here "NFS Share" (explains itself).
I defined a volume capacity of 500GB here, but it doesn't actually matter as the NFS server defines the capacity, see later in this article.
Path is the export path from the NFS server (see /etc/exports on the NFS server).
Server of course is the IP or DNS name of the NFS server.
It's also possible to chose whether this volume should be read-only or not.
Hit the "Save" button and you will see the volume being "Available":

Inside the Kubernetes cluster level, make sure you create a project and a namespace inside the project - if you haven't already.
The previously created volume can now be claimed inside a project. Enter the project where you want to claim the volume (here: "Gamma" project).
In the tab "Workloads", select the navigation tab "Volumes".
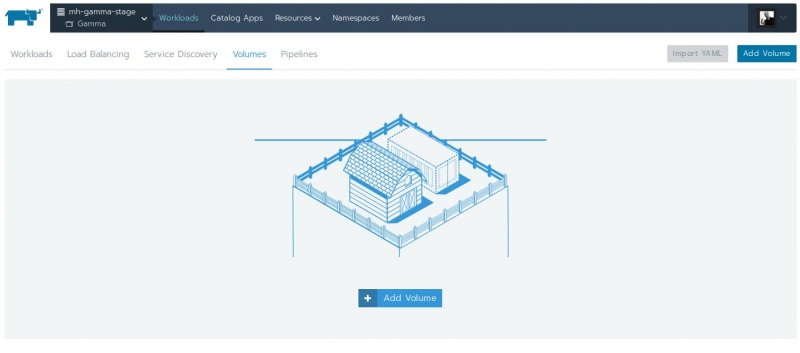
Click on the "Add Volume" button and the "Add Volume Claim" form will show up:
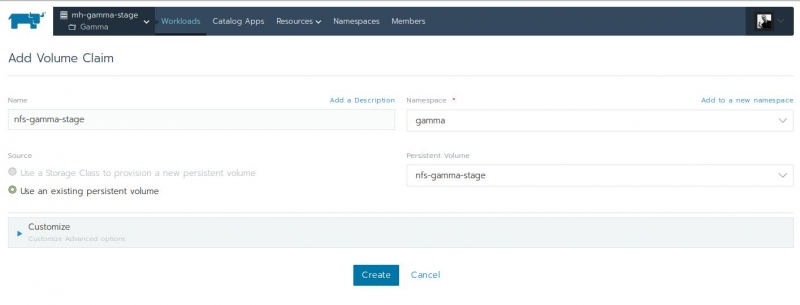
Name: Enter a meaningful name, it can even be the same name as on Kubernetes cluster level.
Namespace: Select the namespace in which the volume should be seen.
Source: Select "Use an existing persistent volume".
Persistent Volume: Select the volume created before.
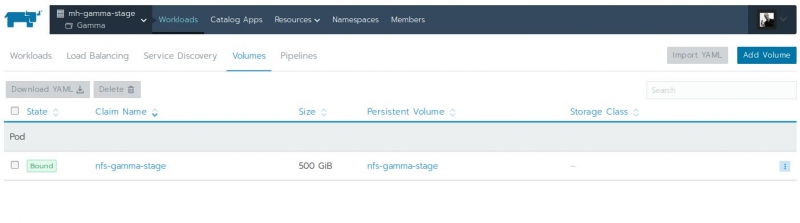
Click on "Create" and the volume will then show up as "Bound":
So far so good, but now we want to have some containers with this persistent volume! Change to the tab "Workloads" and click on the "Deploy" button to deploy a new workload (and therefore container/s):
I chose a commonly used image "ubuntu:xenial" and scrolled down to the "Volumes" configuration.
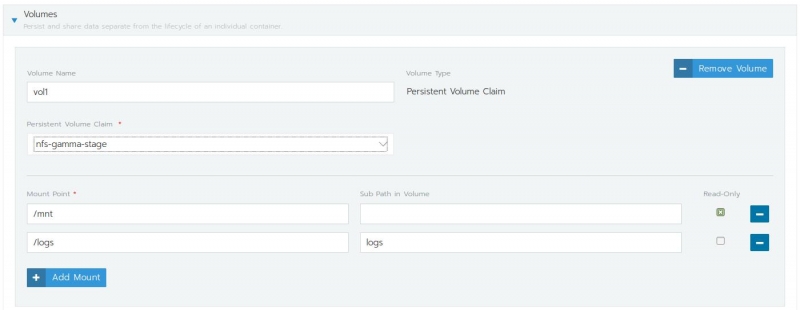
Here I selected the persistent volume I created before and also chose two mount points.
In this example the persistent volume (ergo the NFS share) will be mounted twice:
- /mnt will be used as mount point within the container to mount the whole volume. This will be mounted read-only.
- /logs will be used as mount point within the container to mount a subfolder (logs) of the volume. This will be mounted with read-write permissions.
So this is actually pretty useful: The same volume can be used for multiple mount points. It's not necessary to create several volumes and then mount each volume separately into the container. Saves a lot of work!
After this, deploy the workload.
Once the workload is deployed (you can see this on the green dots), you can execute a shell into a container and verify that the volumes were mounted:
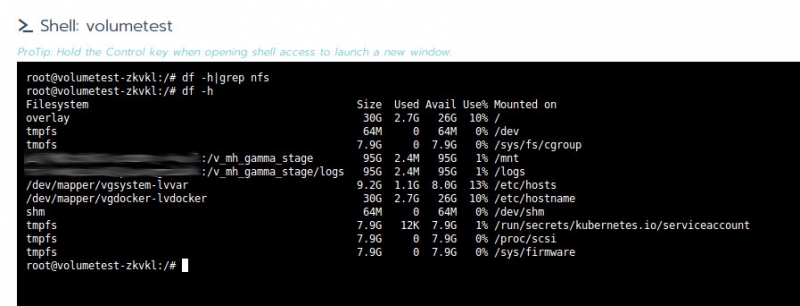
So far so good! Several containers were able to write into the volume at the same time (where read-write was given).
But what about the volume sizing? As you could see above, I set a capacity of 500GB in the user interface but the NFS share in the container clearly shows a size of 95GB.
When we increased the NFS share on the NFS server, this was immediately seen inside the container. So this capacity limit in the Rancher UI seems to be more informational than a restriction (not sure though).